Archive for the ‘Programming’ Category.

Range-based for loop vs std::transform

Some time ago, while doing some code review in work I came across the problem whether the loop in the code I was reviewing should be expressed with std::for_each, std::transform or range-based for loop. The initial code looked pretty much like this:

1
2
3
4
5
6
7
8
std::vector<Type> destination;
destination.reserve(source.size());
 
std::for_each(std::begin(source), std::end(source), 
              [&destination](auto const& p_value)
{
    destination.push_back(SomeStruct{p_value.a, p_value.b, p_value.c});
});

The first things that come to my mind when I see such code are “Why are you using std::for_each? Shouldn’t you use range-based for loop?” Or maybe there should be a std::transform?” Let’s consider those three things:

std::for_each

This is an algorithm from standard library that represents standard for loop that goes over a range defined by begin and end iterator and runs given functor or function. An example of usage is presented above. It utilizes lambda expression that invokes push_back on a std::vector to add elements.

range-based for

Given algorithm can be easily converted to this new form of loop (introduced in C++11).

1
2
3
4
5
6
7
std::vector<Type> destination;
destination.reserve(source.size());
 
for(auto const& p_value : source) 
{
    destination.push_back(SomeStruct{p_value.a, p_value.b, p_value.c});
};

This is the same algorithm but in much clearer and less noisy form.

std::transform

Another considered algorithm is std::transform that is supposed to be used (as the name says) to transform one structure to another. Let’s convert given code to utilize this algorithm.

1
2
3
4
5
6
7
8
std::vector<Type> destination;
destination.reserve(source.size());
 
std::transform(std::begin(source), std::end(source), std::back_inserter(destination),
              [](auto const& p_value)
{
    return SomeStruct{p_value.a, p_value.b, p_value.c};
});

It looks pretty much like std::for_each. The difference is in the name, the third argument and that the lambda returns new value instead of inserting in into the new container.

To be honest, when I have to choose between those versions I would choose std::transform because of its explicitness. This algorithm just says what is done. It gets one array and transforms it into another. std::for_each and range-based-for are just simple loops with no more special meaning than “run this function over this array”. From the last two if I had to choose one, then I would prefer range-based-for since its very clean form of loop over an array (no additional noise in form of lambda or std::begin/std::end).

But…

Since we are considering C++11 there’s one more thing to consider when inserting elements into std::vectoremplace_back. If we have a class with constructor and emplace_back then situation changes, because emplace_back allows us to create objects right inside the vector’s memory. In that case using std::transform doesn’t allow such operation because it requires copy (inside std::back_inserter).

Let’s take look at the code with all scenarios:

1
2
3
4
5
6
7
8
9
10
11
12
13
14
15
16
17
18
19
20
21
22
23
24
25
26
27
28
29
30
31
32
33
34
35
36
37
38
39
40
41
42
43
44
45
46
47
48
49
50
51
52
53
54
55
56
57
58
59
60
61
62
63
64
65
66
67
68
69
70
71
72
73
74
75
76
77
78
79
80
81
82
83
84
85
86
87
88
89
90
91
#include <iostream>
#include <algorithm>
#include <vector>
 
struct TestStruct
{
    TestStruct(int a, std::string b)
        : m_a(a)
        , m_b(b)
    {
        std::cout << ">> Constructor: a=" << m_a << ", b=" << m_b << std::endl;
    }
 
    TestStruct(TestStruct const& src)
        : m_a(src.m_a)
        , m_b(src.m_b)
    {
        std::cout << ">> Copy Constructor: a=" << m_a << ", b=" << m_b << std::endl;
    }
 
    TestStruct(TestStruct && src)
        : m_a(src.m_a)
        , m_b(std::move(src.m_b))
    {
        std::cout << ">> Move Constructor: a=" << m_a << ", b=" << m_b << std::endl;
    }
 
    ~TestStruct()
    {
        std::cout << ">> Destructor: a=" << m_a << ", b=" << m_b << std::endl;
    }
 
private:
    int m_a;
    std::string m_b;
};
 
struct InputStruct
{
    int a;
    std::string b;
};
 
using namespace std;
 
int main(int argc, char *argv[])
{
    InputStruct input[] = {
        { 1, "one" },
        { 2, "two" },
    };
 
    std::cout << "std::for_each:" << std::endl;
 
    std::vector<TestStruct> va;
    va.reserve(std::end(input) - std::begin(input));
    std::for_each(std::begin(input), std::end(input),
                  [&va](auto const& p_in)
    {
        va.push_back(TestStruct{p_in.a, p_in.b});
    });
 
    std::cout << "\nrange-based-for:" << std::endl;
 
    std::vector<TestStruct> vb;
    va.reserve(std::end(input) - std::begin(input));
    for(auto const& p_in : input)
    {
        vb.push_back(TestStruct{p_in.a, p_in.b});
    }
 
    std::cout << "\nstd::transform:" << std::endl;
    std::vector<TestStruct> vc;
    vc.reserve(std::end(input) - std::begin(input));
    std::transform(std::begin(input), std::end(input), std::back_inserter(vc),
                  [](auto const& p_in)
    {
        return TestStruct{p_in.a, p_in.b};
    });
 
    std::cout << "\nrange-based-for + emplace_back:" << std::endl;
 
    std::vector<TestStruct> vd;
    vd.reserve(std::end(input) - std::begin(input));
    for(auto const& p_in : input)
    {
        vd.emplace_back(p_in.a, p_in.b);
    }
 
    std::cout << "\n\nDestruction of all items:" << std::endl;
}

The output is as follows:

1
2
3
4
5
6
7
8
9
10
11
12
13
14
15
16
17
18
19
20
21
22
23
24
25
26
27
28
29
30
31
32
33
34
35
36
37
38
std::for_each:
>> Constructor: a=1, b=one
>> Move Constructor: a=1, b=one
>> Destructor: a=1, b=
>> Constructor: a=2, b=two
>> Move Constructor: a=2, b=two
>> Destructor: a=2, b=
 
range-based-for:
>> Constructor: a=1, b=one
>> Move Constructor: a=1, b=one
>> Destructor: a=1, b=
>> Constructor: a=2, b=two
>> Move Constructor: a=2, b=two
>> Destructor: a=2, b=
 
std::transform:
>> Constructor: a=1, b=one
>> Move Constructor: a=1, b=one
>> Destructor: a=1, b=
>> Constructor: a=2, b=two
>> Move Constructor: a=2, b=two
>> Destructor: a=2, b=
 
range-based-for + emplace_back:
>> Constructor: a=1, b=one
>> Constructor: a=2, b=two
 
 
Destruction of all items:
>> Destructor: a=1, b=one
>> Destructor: a=2, b=two
>> Destructor: a=1, b=one
>> Destructor: a=2, b=two
>> Destructor: a=1, b=one
>> Destructor: a=2, b=two
>> Destructor: a=1, b=one
>> Destructor: a=2, b=two

The output from the app reveals everything. The emplace_back version produces the smallest output, just as suspected, and all other loops does exactly the same thing.

What about POD?

Of course the previous version works smoothly only with classes that defines the constructor which can be used within emplace_back. When considering POD structs that doesn’t have one, the trick won’t work and won’t even compile. When adding POD object into vector it requires explicit use of the struct name when creating new objects that goes to the container.

In such case, in my opinion, the std::transform is the best way to express the intent.

Defined and not defined constructor in C++

C++ is a pretty interesting language because of different quirks that it has. One of such things is the fact that there is a difference between defined constructor, not defined constructor and deleted constructor, especially move constructor.

Consider following code:

1
2
3
4
5
6
7
8
9
10
11
12
13
14
15
16
17
18
19
20
21
22
23
24
25
26
27
28
29
30
31
32
33
34
35
36
37
38
39
40
41
42
43
44
45
46
47
48
49
50
51
52
53
54
55
56
57
58
59
60
61
62
63
64
65
66
67
68
69
70
71
72
73
#include <iostream>
 
struct ExplicitMoveConstructor
{
    ExplicitMoveConstructor()
    {
        std::cout << "Default constructor" << std::endl;
    }
 
    ExplicitMoveConstructor(ExplicitMoveConstructor const& src)
    {
        std::cout << "Copy constructor" << std::endl;
    }
 
    ExplicitMoveConstructor(ExplicitMoveConstructor && src)
    {
        std::cout << "Move constructor" << std::endl;
    }
};
 
struct DeletedMoveConstructor
{
    DeletedMoveConstructor()
    {
        std::cout << "Default constructor" << std::endl;
    }
 
    DeletedMoveConstructor(DeletedMoveConstructor const& src)
    {
        std::cout << "Copy constructor" << std::endl;
    }
 
    DeletedMoveConstructor(DeletedMoveConstructor && src) = delete;
};
 
struct NotDefinedMoveConstructor
{
    NotDefinedMoveConstructor()
    {
        std::cout << "Default constructor" << std::endl;
    }
 
    NotDefinedMoveConstructor(NotDefinedMoveConstructor const& src)
    {
        std::cout << "Copy constructor" << std::endl;
    }
};
 
auto returnExplicitMoveConstructorClass()
{
    ExplicitMoveConstructor cm;
    return cm;
}
 
auto returnDeletedMoveConstructorClass()
{
    DeletedMoveConstructor cm;
    return cm;
}
 
auto returnNotDefinedMoveConstructorClass()
{
    NotDefinedMoveConstructor cm;
    return cm;
}
 
int main()
{
    auto first = returnExplicitMoveConstructorClass();
    auto second = returnDeletedMoveConstructorClass();
    auto third = returnNotDefinedMoveConstructorClass();
    return 0;
}

The presented code does not compile when trying to do so with following command:

clang++ constructor.cpp --std=c++14

The error code is as follows:

constructor.cpp:70:7: error: call to deleted constructor of 'DeletedMoveConstructor'
        auto second = returnDeletedMoveConstructorClass();
             ^        ~~~~~~~~~~~~~~~~~~~~~~~~~~~~~~~~~~~
constructor.cpp:33:2: note: 'DeletedMoveConstructor' has been explicitly marked deleted here
        DeletedMoveConstructor(DeletedMoveConstructor && src) = delete;
        ^
1 error generated.

The error from the compiler says that the move constructor was called but it is marked as deleted. If compiled with g++ it’s pretty much the same.

Conclusions from this are two. The first one is that the deleted constructor is also a declared constructor so the compiler will use it as if it was defined by the user. The second one is that the value returned from function is returned by utilizing move semantic when move constructor is declared, even if it is deleted.

The explaination for this turns out to be quite simple. As written in this post on Stack Overflow, this is the intended behaviour of overload resolution. Since declared, the move constructor is the best match for value returned from function which is an r-value.

Variable Template in C++14

C++14 introduced new type of templates which are variable templates1. What it means is that it’s now possible to create template of a variable like this:

1
2
3
4
template<class Type>
constexpr Type PI = (Type)3.1415;
 
auto v = PI<double>;

This introduces a variable that can take different values for different template parameter. Main gain comes when such value is specialized like template:

1
2
3
4
template<>
constexpr int PI = 4;  // Because I can
 
auto v = PI<int>;

Of course in previous versions of standard this could be done in a slightly different way by using functions like this:

1
2
3
4
5
6
7
8
9
10
11
12
13
template<class Type>
constexpr Type PI()
{
   return (Type)3.1415;
}
 
template<>
constexpr int PI()
{
   return 4;  // Because I can
}
 
auto v = PI<double>();

The difference in usage is “()” which is used in a function call when using function template version. But there is also another difference which makes variable template unfortunately less useful than function template. Since C++11 it is possible to delete a specialization of function template but it seems it’s not possible to delete specialization of variable template:

1
2
3
4
5
6
7
8
9
10
11
12
13
14
template<class Type>
constexpr Type PI()
{
   return (Type)3.1415;
}
 
template<>
constexpr int PI() = delete;
 
template<class Type>
constexpr Type ANSWER = (Type)42;
 
//template<>
//constexpr double ANSWER<double> = delete;   // not possible

But of course no one says that we cannot use both as a syntactic sugar:

1
2
template<class Type>
constexpr Type PI_VAR = PI<Type>();
  1. http://en.cppreference.com/w/cpp/language/variable_template []

C++ problems #1

Two days ago I was working on an old neural network project when some strange bug occured in my code. I was working on debug version of the project with no optimizations (-O0) and then I tried to switch them on to see what will be the gain in performance.

What happened is that it stopped working properly. With no optimizations it worked correctly, giving expected results but with -O2 flag it somehow stopped earlier than expected. After some debugging I’ve managed to find the place where the bug was hidden. This is the place:

1
2
3
4
size_t getOutputLayerSize() const
{
    m_forwardNetwork.getOutputLayerSize();
}

The bug here should be pretty obvious but when running through more code it may well hidden. The obvious thing is that there’s no return statement while the function is defined as returning an unsigned integer value. This code compiles because it may be a valid behaviour in some other cases like following:

1
2
3
4
size_t getOutputLayerSize() const
{
    throw std::runtime_error("");
}

But when nothing is thrown and there is no return statement this is an undefined behaviour and should be avoided.

Why it worked in my case with no optimizations? The m_forwardNetwork.getOutputLayerSize() function call returns an integer value that is saved in eax register. The same register is used in getOutputLayerSize() function to keep the return value which is normally saved by the return statement. With no return statement there is no action but since the value was written in m_forwardNetwork.getOutputLayerSize() it can be used by the caller of getOutputLayerSize() function so it happens to work correctly from caller POV. When optimizations are switched on, the line m_forwardNetwork.getOutputLayerSize() is removed by the compiler because it is not used so there is no function call which means eax register is not written to. In my case it happened that the overal function call return 0 value which wasn’t expected.

My fault was that I haven’t used any warning flags. By adding -Wall compiler starts to emit following warning:

warning: no return statement in function returning non-void [-Wreturn-type]

My advice is to always add -Wall to compilation flags so no error will be omitted. Another advice is to also add a -Werror flag which will force the compiler to fail the compilation if any warning occurs.

Deleting method in class hierarchy

C++11 has this new feature that allows programmer to remove:

  • automatically generated method or operator,
  • overload of free function or method (from implicit conversion)
  • specialization of template method.

This can be done by marking any function with = delete keyword and it works like this:

1
2
3
4
5
6
7
8
9
10
11
12
13
14
15
16
17
18
19
20
21
22
23
24
25
26
27
28
29
30
31
32
33
void foo(unsigned a)
{}
void foo(int) = delete;                         // deleted function overload for implicit conversion to int
 
template<class T>
void bar(T a) 
{}
template<class T>
void bar<double>(double) = delete;              // deleted template function specialization for double type
 
struct Foo 
{
    Foo& operator=(Foo const&) = delete;        // deleted defaultly generated copying assignment operator
 
    void call(unsigned a) {}
    void call(int a) = delete;                  // deleted method overload for implicit conversion to int
};
 
int main()
{
    foo(1u);
    //foo(2);     // error: use of deleted function 'void foo(int)'
 
    bar(Foo());
    //bar(4.0);   // error: use of deleted function 'void bar(T) [with T = double]'
 
    Foo f;
    f.call(1u);
    //f.call(2);  // error: use of deleted function 'virtual void Foo::call(int)'
 
    Foo ff;
    //ff = f;     // error: use of deleted function 'Foo& Foo::operator=(const Foo&)'
}

It is pretty simple and useful. This allows to remove not wanted specialization from any interface, e.g. overloaded signed value if unsigned and only unsigned value is required. Let consider following class hierarchy:

1
2
3
4
5
6
7
8
struct Foo 
{
    virtual void call(unsigned a) {}
};
 
struct Bar : Foo
{
};

What if it is necessary to remove an overload of call method with int argument from interface of base class? Let see what will happen if different variants of call method are called from base class and derived class.

1
2
3
4
5
6
7
8
9
10
11
12
13
14
15
16
17
18
19
struct Foo 
{
    void call(unsigned a) {}
    void call(int) = delete;
};
 
struct Bar : Foo
{
};
 
int main()
{
    Bar b;
    b.call(1u);
    //b.call(1);     // error: use of deleted function 'void Foo::call(int)'
    Foo & f = b;
    f.call(1u);
    //f.call(1);     // error: use of deleted function 'void Foo::call(int)'
}

It works fine. Bar class uses Foo class method declaration so it is not possible to call the call method from both Foo and Bar classes. But what if a programmer would like to have the call method virtual and overridden in derived class?

1
2
3
4
5
6
7
8
9
10
11
12
13
14
15
16
17
18
19
20
struct Foo 
{
    virtual void call(unsigned a) {}
    void call(int) = delete;
};
 
struct Bar : Foo
{
    void call(unsigned a) override {}
};
 
int main()
{
    Bar b;
    b.call(1u);
    b.call(1);       // works since it's not deleted in derived class and can be implicitely casted to unsigned
    Foo & f = b;
    f.call(1u);
    //f.call(1);     // error: use of deleted function 'void Foo::call(int)'
}

Now it is possible to call the call method from Bar class but not from Foo class. But what if ‘virtual’ is put before void call(int) = delete?

1
2
3
4
5
6
7
8
9
10
11
12
13
14
15
16
17
18
19
20
struct Foo 
{
    virtual void call(unsigned a) {}
    virtual void call(int) = delete;
};
 
struct Bar : Foo
{
    void call(unsigned a) override {}
};
 
int main()
{
    Bar b;
    b.call(1u);
    b.call(1);       // works since it's not deleted in derived class and can be implicitely casted to unsigned
    Foo & f = b;
    f.call(1u);
    //f.call(1);     // error: use of deleted function 'void Foo::call(int)'
}

It seems it does not matter if function is virtual or not. But there is another keyword that works with inheritence – final which means that virtual method marked with this keyword cannot be overriden in derived class.

1
2
3
4
5
6
7
8
9
10
11
12
13
14
15
16
17
18
19
20
struct Foo 
{
    virtual void call(unsigned a) {}
    virtual void call(int) final = delete;
};
 
struct Bar : Foo
{
    void call(unsigned a) override {}
};
 
int main()
{
    Bar b;
    b.call(1u);
    b.call(1);       // works since it's not deleted in derived class and can be implicitely casted to unsigned
    Foo & f = b;
    f.call(1u);
    //f.call(1);     // error: use of deleted function 'void Foo::call(int)'
}

It does not matter either if method is final or not. So one and only option is just to declare the call method with int argument as deleted in derived class which should be a first choice of those considerations.

1
2
3
4
5
6
7
8
9
10
11
12
13
14
15
16
17
18
19
20
21
struct Foo 
{
    virtual void call(unsigned a) {}
    virtual void call(int) final = delete;
};
 
struct Bar : Foo
{
    void call(unsigned a) override {}
    //void call(int) = delete;           // error: use of deleted function 'virtual void Bar::call(int)'
};
 
int main()
{
    Bar b;
    b.call(1u);
    b.call(1);       // works since it's not deleted in derived class and can be implicitely casted to unsigned
    Foo & f = b;
    f.call(1u);
    //f.call(1);     // error: use of deleted function 'void Foo::call(int)'
}

Ooops. Method void call(int) is marked as final in base class so it is not even possible to declare it as deleted in derived class. The one and only valid example that works as it supposed to from the beginning look like this:

1
2
3
4
5
6
7
8
9
10
11
12
13
14
15
16
17
18
19
20
21
22
struct Foo 
{
    virtual void call(unsigned a) {}
    void call(int) = delete;
};
 
struct Bar : Foo
{
    void call(unsigned a) override {}    // If we want to override call()
    using Foo::call;                     // if we want to use Foo::call()
    void call(int) = delete;
};
 
int main()
{
    Bar b;
    b.call(1u);
    //b.call(1);     // error: use of deleted function 'void Bar::call(int)'
    Foo & f = b;
    f.call(1u);
    //f.call(1);     // error: use of deleted function 'void Foo::call(int)'
}

In conclusion it is not possible to declare the method overload as deleted in base class so that it will affect derived class if base method is marked as virtual and overriden in derived class. This concerns mostly the interfaces with methods that may accept some unsigned key value while there exists some signed key type, that should not be passed to considered methods.


All examples were compiled with GCC 5.2 with –std=c++14 flag.

Variadic arguments

Old C++ and C for a long time allow creating functions with unknown number of arguments. Most common example of such function is printf which prints text with formatted variables. It gets format as first argument and values to be printed in that format in other arguments. Following code shows its declaration:

int printf(const char * restrict format, ... );

Processing such argument list is done in runtime and it utilizes special macros or types from following list1:

  • va_start – enable access to variadic function arguments,
  • va_arg – accesses the next variadic function argument,
  • va_copy – makes a copy of the variadic function arguments,
  • va_end – ends traversal of the variadic function arguments,
  • va_list – holds the information needed by va_start, va_arg, va_end, and va_copy.

Following example presents simple usage of such function:

1
2
3
4
5
6
7
8
9
10
11
12
13
14
15
16
17
18
19
20
#include <iostream>
#include <cstdarg>
 
double sum(int count, ...) 
{
    double sum = 0.0;
    va_list args;
    va_start(args, count);
    for (int i = 0; i < count; ++i) 
    {
        sum += va_arg(args, double);
    }
    va_end(args);
    return sum;
}
 
int main() 
{
    std::cout << sum(4, 25.0, 27.3, 26.9, 25.7);
}

Firstly va_start binds arguments passed to the function by elipsis (…) to variable args of type va_list. It takes instance of such type and number of arguments it want to access. Then all arguments are accessed subsequently by macro va_arg which takes list as an argument and returned type. At the end of processing arguments list should be unbound with macro va_end. To process same list of arguments more than once it can be copied to another list right after processing is started with macro va_copy (see2 for more).

Of course presented code is just an example. Real implementation of such function should utilize std::accumulate. Also this code shows some pitfalls of variadic arguments – number of arguments must be passed as one of firsts arguments and may not match the exact number of arguments passed to the function, also types can be different than expected in method.

  1. http://en.cppreference.com/w/cpp/language/variadic_arguments []
  2. http://en.cppreference.com/w/cpp/language/variadic_arguments []

Reading RFID tags on Android

As promised some time ago, this post will be about Android.

About half year ago I bought Samsung Galaxy Nexus as my first Android phone and I found one thing interesting – the Near Field Communication (NFC).

Near field communication (NFC) is a set of standards for smartphones and similar devices to establish radio communication with each other by touching them together or bringing them into close proximity, usually no more than a few centimeters.1

In short, this is a technology based on RFID2 tags that allows smartphone to do 3 things:

  • read and write RFID tags,
  • emulate RFID tag,
  • send small amount of data between devices in small proximity.

The first one can be used to read tags that matches MIME types on the device to activate some functionality, configure the device or just to read cards that uses the RFID technology. It’s also possible to write to those tags. The second enables the device to behave as RFID tag for another devices. And the third is used for communication between two devices, mostly to setup another, more powerful connection type such as Bluetooth or WiFi.

In this post I will show how to read data from the RFID tags since I don’t have any available card to write to. Fortunately this task is quite well covered by Android SDK3 documentation so I will just write a quick setup of the basic project. I assume that an empty project is created with basic implementation provided by Eclipse or Android tool from SDK.

Enabling NFC in the project

First of all, to enable NFC in the project the modification of the AndroidManifest.xml file is required. The NFC is available since version 10 and requires special permission – android.permission.NFC. To enable it just add following code to the manifest node:

1
2
3
4
5
6
7
8
9
10
11
12
13
<uses-sdk 
   android:minSdkVersion="10" 
   android:targetSdkVersion="15" 
   />
 
<uses-permission 
   android:name="android.permission.NFC"
   />
 
<uses-feature 
   android:name="android.hardware.nfc" 
   android:required="true" 
   />

uses-feature entry means here that the application requires NFC and won’t work without it.

Since RFID tags are read and dispatched by the Android, application must register an Intent filter and a Techlist to get them. To do this add following code to activity node in manifest file:

1
2
3
4
5
6
7
<intent-filter>
   <action android:name="android.nfc.action.TECH_DISCOVERED"/>
</intent-filter>
<meta-data
   android:name="android.nfc.action.TECH_DISCOVERED"
   android:resource="@xml/techlist"
   />

There are free types of actions that can be used with NFC – android.nfc.action.NDEF_DISCOVERED, android.nfc.action.TECH_DISCOVERED and android.nfc.action.TAG_DISCOVERED. I chose the android.nfc.action.TECH_DISCOVERED because none of my RFID chips had NDEF messages and TAG, as the documentation says, is too general. Also TECH just worked.
As you can see the code also specifies the techlist xml file. This file contains a list of NFC technologies supported by the application. @xml/techlist means that this file has name techlist.xml and lies in res/xml/ directory. Following code shows an example of my file:

1
2
3
4
5
6
<resources xmlns:xliff="urn:oasis:names:tc:xliff:document:1.2">
   <tech-list>
      <tech>android.nfc.tech.MifareClassic</tech>
      <tech>android.nfc.tech.NfcA</tech> 
   </tech-list>
</resources>

This covers basic setup of NFC but requires the user to specify the application which will handle the Tag everytime it is read by Android. It is quite annoying so Android allows to register an Activity in the foreground to be the default one for handling Tag intents. To do that add following code to your Activity class:

1
2
3
4
5
6
7
8
9
10
11
12
13
14
15
16
17
18
19
20
21
22
23
24
25
26
27
28
29
30
31
32
33
34
35
36
37
38
39
40
41
42
43
44
45
46
47
48
49
50
51
52
53
54
55
56
57
58
59
60
61
62
63
64
65
66
67
68
69
70
71
72
private NfcAdapter mAdapter = null;
private PendingIntent mPendingIntent = null;
private IntentFilter[] mIntentFilters = null;
private String[][] mTechLists = null;
 
public void onCreate(Bundle savedInstanceState) {
   /* ... */
 
   mAdapter = (NfcAdapter)NfcAdapter.getDefaultAdapter(this);
 
   // Creating PendingIndent for foreground dispatching
   mPendingIntent = PendingIntent.getActivity(
         this, 
         0, 
         new Intent(this, this.getClass()).addFlags(Intent.FLAG_ACTIVITY_SINGLE_TOP), 
         0);
 
   IntentFilter tech = new IntentFilter(NfcAdapter.ACTION_TECH_DISCOVERED);
   try {
      ndef.addDataType("*/*");
   } catch(MalformedMimeTypeException e) {
      throw new RuntimeException("fail", e);
   }
 
   mIntentFilters = new IntentFilter[] { tech };
   mTechLists = new String[][] { getTechList(this.getResources()) };
 
   /* ... */
}
 
public void onResume() {
   /* ... */
 
   mAdapter.enableForegroundDispatch(this, mPendingIntent, mIntentFilters, mTechLists);
 
   /* ... */
}
 
public void onPause() {
   /* ... */
 
   mAdapter.disableForegroundDispatch(this);
 
   /* ... */
}
 
private static String[] getTechList(Resources resources) {
   ArrayList<String> list = new ArrayList<String>();
   XmlResourceParser xml = resources.getXml(R.xml.techlist);
 
   // Assumed simple parsing because of simple file structure
   for(;;) {
      int eventType = XmlPullParser.END_DOCUMENT;
      try {
         eventType = xml.next();
      } catch (XmlPullParserException e) {
         // TODO Auto-generated catch block
         e.printStackTrace();
      } catch (IOException e) {
         // TODO Auto-generated catch block
         e.printStackTrace();
      }
 
      if(eventType == XmlPullParser.TEXT) {
         list.add(xml.getText());
      } else if(eventType == XmlPullParser.END_DOCUMENT) {
         break;
      }
   }
 
   return list.toArray(new String[list.size()]);
}

In short, this code creates an instance of PendingIntent, IntentFilter for TECH_DISCOVERED action and all MIME types (see */*), and loads list of supported technologies from file specified earlier. Those objects are then used in onResume and onPause methods to enable and disable foreground dispatching so the application could handle the Intent before others.

Handling NFC intent

Reading NFC tags is easy. Android provides classes to read tags from some technologies such as those specified earlier in techlist.xml. In this post I will also show an example that utilizes the MifareClassic class. MIFARE Classic4 is a standard that defines tags with blocks of data that can be written to. The one that is commonly used is a MIFARE Classic 1K which can hold 1 KB in 16 sectors with 4 blocks each. Each sector is secured by pair of 48-bit keys – first for read access and second for write access. There are 3 commonly used keys that by default protect all sectors and allow the access to them if hadn’t been changed – KEY_DEFAULT, KEY_MIFARE_APPLICATION_DIRECTORY and KEY_NFC_FORUM.

Ok, lets try now to handle an Intent with RFID tag. First of all, there are two moments when Activity can handle an Intent. First is when Activity is registered as a handler for this type of intents and second is when Activity is already on the screen. To handle both situations add following code to your Activity class:

1
2
3
4
5
6
7
8
9
10
11
12
13
14
15
@Override
public void onCreate(Bundle savedInstanceState) {
   super.onCreate(savedInstanceState);
 
   /* ... */
 
   // Passing intent
   Intent intent = getIntent();
   resolveIntent(intent);                 // This handles first situation
}
 
@Override
public void onNewIntent(Intent intent) {
   resolveIntent(intent);                 // This handles second situation
}

When Activity is created because of the NFC Intent it can be retrived in onCreate, but when Activity is already on the screen and handles this type of Intent you must override the onNewIntent method to handle it.

Ok, but how to exactly handle the tag Intent? Following function does that for MIFARE Classic tag:

1
2
3
4
5
6
7
8
9
10
11
12
13
14
15
16
17
18
19
20
21
22
23
24
25
26
27
28
29
30
31
32
33
34
35
36
37
38
39
40
41
42
43
44
45
46
47
48
49
50
51
52
53
54
55
56
57
58
59
60
61
62
63
64
65
private void resolveIntent(Intent intent) {
 
   if(NfcAdapter.ACTION_TECH_DISCOVERED.equals(intent.getAction())) {
 
      Tag tag = intent.getParcelableExtra(NfcAdapter.EXTRA_TAG);
      MifareClassic mfc = MifareClassic.get(tag);
 
      try {
         mfc.connect();
 
         mLogger.pushStatus("");
         mLogger.pushStatus("== MifareClassic Info == ");
         mLogger.pushStatus("Size: " + mfc.getSize());
         mLogger.pushStatus("Timeout: " + mfc.getTimeout());
         mLogger.pushStatus("Type: " + mfc.getType());
         mLogger.pushStatus("BlockCount: " + mfc.getBlockCount());
         mLogger.pushStatus("MaxTransceiveLength: " + mfc.getMaxTransceiveLength());
         mLogger.pushStatus("SectorCount: " + mfc.getSectorCount());
 
         mStatus.setStatus("Reading sectors...");
 
         for(int i = 0; i < mfc.getSectorCount(); ++i) {
 
            if(mfc.authenticateSectorWithKeyA(i, MifareClassic.KEY_MIFARE_APPLICATION_DIRECTORY)){
               mLogger.pushStatus("Authorization granted to sector " + i + " with MAD key");
            } else if(mfc.authenticateSectorWithKeyA(i, MifareClassic.KEY_DEFAULT)) {
               mLogger.pushStatus("Authorization granted to sector " + i + " with DEFAULT key");
            } else if(mfc.authenticateSectorWithKeyA(i, MifareClassic.KEY_NFC_FORUM)) {
               mLogger.pushStatus("Authorization granted to sector " + i + " with NFC_FORUM key");
            } else {
               mLogger.pushStatus("Authorization denied to sector " + i);
               continue;
            }            
 
            for(int k = 0; k < mfc.getBlockCountInSector(i); ++k)
            {
               int block = mfc.sectorToBlock(i) + k;
               byte[] data = null;
 
               try {
 
                  data = mfc.readBlock(block);
               } catch (IOException e) {
                  mLogger.pushStatus("Block " + block + " data: " + e.getMessage());
                  continue;
               }
 
               String blockData = Common.getHexString(data);
               mLogger.pushStatus("Block " + block + " data: " + blockData);
            }
         }
         mfc.close();
 
      } catch (IOException e) {
         mLogger.pushStatus(e.getMessage());
      } finally {
         try {
            mfc.close();
         } catch (IOException e) {
            // TODO Auto-generated catch block
            e.printStackTrace();
         }
      }
   }
}

At first the tag is retrived from the Intent by method getParcelableExtra with argument of NfcAdapter.EXTRA_TAG. Then using static function from MifareClassic the object of this class is created from tag. The next step is to use connect method to establish the connection. At the time of connection the card must be close to the reader till the end of this method.
To actually read the data of any block the sector that this block belongs to must be authenticated with matching key. This is done with method authenticateSectorWithKeyA which expects an index of the sector and 6-byte authentication key. After authentication it is possible to read all 4 blocks from this sector which is done by method readBlock that expects an absolute index of the block (not relative to sector). Finally after doing all operations the close method should be invoked, even if an Exception occurs because it doesn’t close the connection by default and may cause a problem when trying to read the same tag with other technology.

Summary

Reading an RFID tag is pretty easy on Android devices as the SDK provides some high level API to do that. As I read the Android Beam is also supported with nice easy to use class. Unfortunately there is a problem with emulation of RFID tags because there’s no official API to for this kinds of operations as some people say5. On the other hand the device supports that and it is possible to build an Android with some support of this6. I shall try it when I would move to CyanogenMod.

The actual code of what I am doing with my phone and NFC can be found on GitHub here.

  1. http://en.wikipedia.org/wiki/Near_field_communication] []
  2. http://en.wikipedia.org/wiki/Radio-frequency_identification []
  3. http://developer.android.com/guide/topics/connectivity/nfc/nfc.html []
  4. http://en.wikipedia.org/wiki/MIFARE []
  5. http://forum.xda-developers.com/showthread.php?t=1368907 []
  6. http://forum.xda-developers.com/showthread.php?t=1281946 []

Optymalizacja aplikacji C++ z wykorzystaniem AMD CodeAnalyst

W tej notce opiszę moją pierwszą porządną styczność z programem CodeAnalyst i przy okazji pokażę, w jaki sposób udało mi się nieco zoptymalizować napisaną przeze mnie aplikację implementującą rozwiązywanie problemu kolorowania grafu za pomocą algorytmu genetycznego.

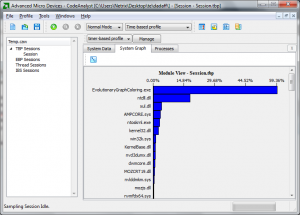
CodeAnalyst - Okno główne programuCodeAnalyst jest programem służącym do profilowania aplikacji. Jego zadaniem jest zbieranie różnego rodzaju próbek w trakcie działania testowanej aplikacji, które są następnie przedstawiane w formie wykresu lub tabeli. Dzięki temu widać od razu, które miejsca aplikacji mają największy wpływ na badany parametr z dokładnością do wykonywanych instrukcji Assemblera. Program ten można znaleźć na stronie producenta. Jego główne okienko jest przedstawione na obrazku obok.

Jak już wspomniałem badaną aplikacją jest moja implementacja algorytmu ewolucyjnego użytego do rozwiązania problemu kolorowania grafu. Kod tej aplikacji wraz z przykładowym grafem znajduje się tutaj. Jest to kod, od którego wychodzę w tej notce, zatem nie uwzględnia on żadnych poprawek. Poniższa tabela zawiera średnie wyniki pomiaru cykli i czasu jakie zabiera główna pętla programu na dwóch maszynach:

Procesor System Kompilator Częstotliwość zegara Liczba cykli Czas
AMD Turion64 2 GHz MS Windows 7 msvc 25 MHz (QPF) 4111926149 cykli (QPC) 164,48 s
Intel Pentium 4 2,66 GHz Linux g++ 2659,98 MHz (cpuinfo) 268359191768 cykli (__rdtsc()) 100,89 s

Optymalizacja będzie dotyczyć głównie tej pierwszej platformy, ale postanowiłem z ciekawości sprawdzić jak zmiany będą wpływać na czas wykonywania się kodu również na drugiej platformie.

Analiza programu będzie polegać na szukaniu miejsc, w których spędza on najwięcej czasu. Zatem na początek należy uruchomić program CodeAnalyst, a następnie utworzyć projekt wybierając profil Time-based profile. Według mnie dobrze jest również zaznaczyć opcje Stop data collection when app exits oraz Profile the duration of the app execution. Dzięki temu CodeAnalyst poczeka z analizą wyników aż badana aplikacja skończy działanie. Po utworzeniu projektu można przystąpić do testów. Zatem po wyciszeniu/wyłączeniu niepotrzebnych aplikacji można wybrać z menu Profile -> Start lub kliknąć zieloną strzałkę.

Po zakończeniu działania aplikacji zostanie wyświetlone podsumowanie, które wygląda mniej więcej tak:
CodeAnalyst - System dataCodeAnalyst - System graph

Obie te zakładki przedstawiają dokładnie to samo, czyli procentowy udział próbek w każdej aplikacji/bibliotece/module, różnica występuje tylko w formie przedstawienia danych. Co w tym podsumowaniu jest interesującego? W tym widoku jeszcze nic, ale CodeAnalyst umożliwia podgląd szczegółów każdego z wymienionych wcześniej bytów, nawet dowolnego procesu wybranego z zakładki Processes. Jednak ponieważ ta notka obejmuje tylko jedną aplikacje, w dodatku tę, która zebrała najwięcej próbek, zatem przejdę teraz do niej. Oto co pokazuje się po dwukrotnym kliknięciu na jej proces:
CodeAnalyst - Testowana aplikacja

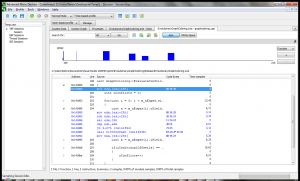
W tym widoku widać już nieco więcej. Są tu pokazane funkcje, które zabierały najwięcej czasu. Na samej górze widać jedną, która zabiera aż 40% próbek, jest to funkcja EvaluateConflicts(), która zlicza konflikty dla każdego osobnika w całej populacji. Warto się jej przyjrzeć z bliska:
CodeAnalysy - Podgląd funkcji EvaluateConflicts()

CodeAnalyst, wykorzystując dane zawarte w pliku .pdb, który powinien znajdować się obok pliku wykonywalnego, potrafi wyświetlić i dopasować próbki do odpowiedniego miejsca w kodzie. Można również podejrzeć wykonywany w tym miejscu kod Assemblera, co jest bardzo przydatne (żeby nie powiedzieć kluczowe) przy profilowaniu aplikacji. Co zatem widać na powyższym screenie? Jest tam coś co tak naprawdę powinno znajdować się tylko i wyłącznie w aplikacji kompilowanej w trybie Debug. To sprawdzanie poprawności odwołania się do elementu tablicy w klasie std::vector. Jest to nieco dziwne, ponieważ jest tam używany operator[], a standardowo ta wersja odwołania nie powinna być sprawdzana, w przeciwieństwie do funkcji at().
Okazuje się jednak, że implementacja STL dostarczana z kompilatorem msvc ma zaimplementowane takie sprawdzenie, które można co prawda wyłączyć flagą _SECURE_SCL ustawioną na 0, ale domyślnie ta opcja jest włączona. Więcej informacji można znaleźć tu lub bezpośrednio tutaj.

Poniższa tabela zawiera wyniki pomiarów cykli i czasu z wyłączeniem tego sprawdzania:

Procesor System Kompilator Częstotliwość zegara Liczba cykli Czas Zysk
AMD Turion64 2 GHz MS Windows 7 msvc 25 MHz (QPF) 3191994350 cykli (QPC) 127,68 s 22,37%
Intel Pentium 4 2,66 GHz Linux g++ 2659,98 MHz (cpuinfo) 269220460226 cykli (__rdtsc()) 101,21 s -0.32%

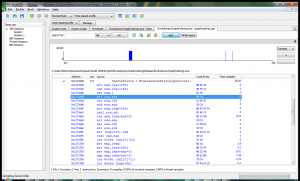
W przypadku msvc widać, że jest już lepiej, a przypadek gcc został praktycznie nietknięty, zatem nie posiada on domyślnie tego typu sprawdzania. Na poniższych screenach widnieją wyniki ponownego próbkowania aplikacji.
CodeAnalysy - Próbki w programie po pierwszej poprawceCodeAnalyst - Funkcja EvaluateConflicts po wprowadzeniu pierwszych poprawek

Jak można zauważyć, ta drobna poprawka pozwoliła kompilatorowi zinline’ować całą funkcję EvaluateConflicts(). Dzięki temu aplikacja wykonuje się szybciej o ok. 22 %. Kod tej wersji znajduje się pod tym linkiem.

Jednak na tym nie koniec poprawek, ponieważ jest jeszcze jedno miejsce, z którym da się coś zrobić. Otóż jeśli się przyjrzeć podsumowaniu całej aplikacji jeszcze raz, można zauważyć, że spędza ona dużo czasu w funkcji insert() drzewa std::_Tree, które jest implementacją zbioru (std::set) w bibliotece standardowej. Klasa ta jest używana w operatorze selekcji w celu wybrania losowych i niepowtarzających się osobników do turnieju. Co za tym idzie, funkcja insert() jest wywoływana minimum raz dla każdego wolnego miejsca w turnieju (w przypadku testowym jest 50 miejsc), aż do wypełnienia całej nowej populacji (tutaj 5000), czyli krótko mówiąc – dość często.

Rozwiązaniem, które przyjąłem w tym miejscu było całkowite pozbycie się klasy std::set na rzecz własnego sposobu wybierania losowych i różnych osobników do turnieju. Wynikiem tego jest taka oto klasa:

1
2
3
4
5
6
7
8
9
10
11
12
13
14
15
16
17
18
19
20
21
22
23
24
25
26
template<uint RANGE>
class RandomSet    // singleton
{
public:
    RandomSet()
    { 
        for(uint i = 0; i < RANGE; ++i)
        { m_aSet[i] = i; }
    }
 
    const uint* GetRandomSet(uint uCount, uint uInnerRange)
    {
        uint uTemp, uRand;
        for(uint i = 0; i < uCount; ++i)
        {
            uRand = rand() % (uInnerRange - i);
            uTemp = m_aSet[i];
            m_aSet[i] = m_aSet[i + uRand];
            m_aSet[i + uRand] = uTemp;
        }
        return m_aSet;
    }
 
private:
    uint m_aSet[RANGE];
};

Klasa ta wykorzystuje tablicę, w której zapisane są kolejno indeksy wszystkich osobników. Przy każdym wywołaniu funkcji GetRandomSet() tablica ta jest ponownie mieszana tak, by na jej początku znalazły się w miarę losowe wartości. Dzięki temu, że wybierane wartości są zamieniane z wartościami z początku tablicy, zbiór pozostaje pełny ale jest on stopniowo mieszany, przy czym największa różnorodność występuje zawsze na początku tablicy. To ostatnie nie ma tak naprawdę większego znaczenia, ponieważ najważniejsze jest to, żeby funkcja zwracała za każdym razem różne wartości.

Kolejna tabela zawiera wyniki testów po wprowadzeniu tych zmian:

Procesor System Kompilator Częstotliwość zegara Liczba cykli Czas Zysk
AMD Turion64 2 GHz MS Windows 7 msvc 25 MHz (QPF) 1144922576 cykli (QPC) 45,8 s 64,13 %
Intel Pentium 4 2,66 GHz Linux g++ 2659,98 MHz (cpuinfo) 105596054178 cykli (__rdtsc()) 39,7 s 60,78 %

W przypadku tej poprawki można już zaobserwować znaczny zysk i to na obu platformach (Windows – 64%, Linux – 61 %). Na poniższych obrazkach kolejne zrzuty z CodeAnalyst.
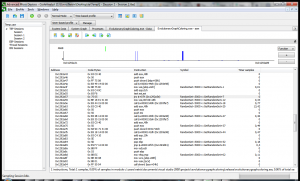
CodeAnalyst - Poprawka GetRandomSet - podsumowanie aplikacjiCodeAnalyst - Poprawka GetRandomSet - funkcja

Widać tutaj, że ilość próbkowanego kodu znacznie zmalała, a proporcje między funkcjami znów się zróżnicowały. Dzięki temu można zobaczyć, że funkcja GetRandomSet() zabiera znacznie mniej próbek niż EvaluateGeneration(). Kod tej wersji można pobrać stąd.

Pozostaje teraz ponownie zapytać, czy można coś tu jeszcze zoptymalizować? Może i można, ale prawdopodobnie zajmie to już trochę więcej czasu niż poprzednie poprawki. Jednym z oczywistych kroków jakie można tutaj wykonać to zastąpienie std::vector zwykłymi tablicami dynamicznymi, ale w tym przypadku zysk jest osiągalny tylko na Linuksie co pokazuje kolejna tabela:

Procesor System Kompilator Częstotliwość zegara Liczba cykli Czas Zysk
AMD Turion64 2 GHz MS Windows 7 msvc 25 MHz (QPF) 1144922576 cykli (QPC) 46,2 s -0.89 %
Intel Pentium 4 2,66 GHz Linux g++ 2659,98 MHz (cpuinfo) 105596054178 cykli (__rdtsc()) 37 s 6,78 %

Kod tego przypadku znajduje się tutaj.

I to właściwie tyle, wnioski? CodeAnalyst jest bardzo dobrym narzędziem do profilowania aplikacji, jest łatwy w obsłudze, a co najważniejsze jest za darmo. Oprócz tego warto zwracać uwagę na implementacje biblioteki standardowej w używanym kompilatorze, ponieważ można się nieco zdziwić, tak jak to miało miejsce w przypadku std::vector w tym przykładzie. Dodatkowo warto czasami poszukać innych rozwiązań dla niektórych problemów, ponieważ wyniki mogą okazać się całkiem zaskakujące.

Na koniec jeszcze taka małą dygresja odnośnie algorytmu ewolucyjnego – operator mutacji powinien testować prawdodpobieństwo dla każdego genu osobnika (czyli koloru węzła), a nie tak jak w tej implementacji, dla całego osobnika :).

Operacje na systemie plików w systemach Windows i Linux w C++

Tym razem notka o tym, w jaki sposób można wykonywać różne operacje w systemie plików w wymienionych w temacie systemach. Oczywiście każdy programista C/C++ zna funkcje wykonujące podstawowe operacje na plikach, takie jak:

  • odczyt, modyfikacja, zapis (funkcja fopen i poboczne oraz klasy fstream)
  • zmiana nazwy pliku lub katalogu (funkcja rename())
  • usunięcie pliku (funkcja remove())

Nieco więcej problemów sprawiają pozostałe operacje, takie jak np. pobranie pełnej ścieżki do pliku czy przeglądanie listy plików w katalogu, ponieważ w bibliotece standardowej nie ma do tego celu odpowiednich funkcji, zatem należy ich szukać w API systemu. Niestety co API to różne funkcje, ale zdarzają się i takie, które istnieją w obu systemach.

Na początek pobieranie pełnej ścieżki do bieżącego katalogu, czyli funkcja getcwd. Jej prototyp w systemie Windows jest następujący:

#include <direct.h>
char* _getcwd(char* _DstBuf, int _SizeInBytes);

a w systemie Linux:

#include <unistd.h>
char* getcwd(char* _DstBuf, int _SizeInBytes);

Jak widać prototyp obu funkcji jest identyczny, więc nic nie stoi na przeszkodzie utworzenia sobie odpowiedniego aliasu nazwy za pomocą typedef.

Trochę lepiej jest z funkcją stat() i jej strukturą o tej samej nazwie (thx C…, typedef needed), która istnieje w obu systemach. Funkcja ta służy do pobierania pełnych informacji o pliku, czyli np. daty modyfikacji, typu czy rozmiaru. Jej przykładowe użycie wygląda następująco:

1
2
3
4
5
6
7
8
9
10
11
#include <sys/stat.h>
typedef struct stat FileStatus; // thx C
 
/*...*/
FileStatus fileStatus;
if(stat(szFullPath.c_str(), &fileStatus) < 0)
{
    return;
}
 
unsigned int uFileSize = fileStatus.st_size;	// Pobranie rozmiaru pliku

Nieco gorzej jest z wyciąganiem listy plików w katalogu, ponieważ w tym przypadku oba systemy mają do tego różne funkcje. W przypadku systemu Windows wygląda to tak:

1
2
3
4
5
6
7
8
9
10
11
12
13
14
15
16
17
18
19
20
21
22
23
24
25
26
#include <windows.h>
/*...*/
 
WIN32_FIND_DATA info;
HANDLE hFind = FindFirstFile(szDirPath, &info);
 
if(INVALID_HANDLE_VALUE == hFind)
{
    printf("Error");
    return;
}
 
do
{
    if((info.dwFileAttributes & FILE_ATTRIBUTE_DIRECTORY) != 0)
    {
        printf("Directory: %s\n", info.cFileName);
    }
    else
    {
        printf("File: %s\n", info.cFileName);
    }
}
while(FindNextFile(hFind, &info) != 0);
 
FindClose(hFind);

A w systemie Linux tak:

1
2
3
4
5
6
7
8
9
10
11
12
13
14
15
16
17
18
19
20
21
22
23
24
25
26
27
28
29
30
31
32
33
34
35
36
37
38
#include <dirent.h>
#include <string.h> // c-string operations
typedef struct dirent DirEntry;
typedef struct stat DirEntryStat; // thx C again
 
DIR* pDir;
pDir = opendir(szDirPath);
if(pDir == null)
{
    printf("Error");
    return;
}
 
DirEntry* pDirent;
DirEntryStat dirEntryStat;
while((pDirent = readdir(pDir)) != null)
{
    char buffer[255];
    strcpy(buffer, szDirPath);
    strcat(buffer, pDirent->d_name);	// Do ponizszej funkcji potrzebna jest sciezka z biezacego katalogu
 
    if(stat((buffer, &dirEntryStat) < 0)
    {
        printf("Error");
        continue;	// file corrupted... NEXT!
    }
 
    if((dirEntryStat.st_mode & S_IFDIR) != 0)	// Katalog
    {
        printf("Directory: %s\n", pDirent->d_name);
    }
    else if((dirEntryStat.st_mode & S_IFREG) != 0)	// Plik
    {
        printf("File: %s\n", info.pDirent->d_name);
    }
}
 
closedir(pDir);

Można zauważyć, że funkcja z WinAPI jest nieco przyjaźniejsza, ponieważ operuje na uchwycie do żądanego katalogu, w przeciwieństwie do funkcji Linuksowej, która po prostu zwraca nazwę tego co siedzi w katalogu i nic więcej.

Komunikacja za pomocą JSON z serwerem PHP w Javie

Jakiś czas temu pisałem pewną aplikację w Javie, która wykorzystywała format JSON do komunikacji z serwerem i wywoływania na nim pewnych procedur. Można rzec, że była to bardzo uboga wersja JSON-RPC czyli oficjalnego protokołu wywoływania procedur na zdalnej maszynie.

JSON, podobnie jak w XML, jest formatem przesyłu danych w postaci tekstu (czyli postaci odpowiedniej dla człowieka), ale w przeciwieństwie do niego jest lżejszy, co widać chociażby po tym, że sam jest opisywany za pomocą tylko kilku znaków. Pomimo tego, że format ten pochodzi z języka Java Script, istnieje masa bibliotek, które umożliwiają jego wykorzystanie w wielu językach, w tym właśnie w języku Java.

W przypadku aplikacji, którą pisałem, jednym z jej zadań było łączenie się z serwerem napisanym PHP i wywoływaniem odpowiednich procedur, które udostępniały jakieś dane. Format procedur był następujący:

“sessid”: “id”
”action”: “akcja”
”data”: “dane”

Przy czym dane również były zapisane w formacie JSON, ale były zorganizowane w odpowiednie struktury, które rozpoznawał serwer. Biblioteką, którą użyłem do wysyłania i odbierania danych była org.json, czyli pierwsza z dostępnych dla języka JAVA. W przypadku mojego kodu jej użycie ograniczyło się do użyciu tylko dwóch klas – JSONObject oraz JSONArray, z których za pomocą metody toString(), można wyciągnąć całą zapisaną hierarchię i następnie wysłać ją za pomocą odpowiedniego strumienia połączonego z serwerem.

Teraz przedstawię trochę kodu pokazującego w jaki sposób połączyć się z serwerem za pomocą HttpURLConnection oraz jak wykorzystać to połączenie do przesłania danych w formacie JSON. Na początek kod wysyłający zapytanie i odbierający odpowiedź serwera:

1
2
3
4
5
6
7
8
9
10
11
12
13
14
15
16
17
18
19
20
21
22
23
24
25
26
27
28
29
import java.io.*;		// BufferedReader, BufferedWriter, IOException, InputStreamReader, OutputStreamWriter
import.java.net.*;		// HttpURLConnection, URL
 
/*
...
*/
 
URL url = new URL(“http://mysweet.phpserver.com/”);
HttpURLConnection conn = (HttpURLConnection)url.openConnection();
 
conn.setDoOutput(true);			// Bo chcemy wysyłać
conn.setRequestMethod(“POST”);		// np. jako zapytanie POST
 
// Request
BufferedWriter out = new BufferedWriter(new OutputStreamWriter(conn.getOutputStream()));
out.write(“Some post data/query”);
out.close();
 
// Response
BufferedReader in = new BufferedReader(new InputStreamReader(conn.getInputStream()));
 
String inputLine, answer = “”;
while((inputLine = in.readLine()) != null)
{
    answer += inputLine;
}
 
in.close();
conn.disconnect();

Jak widać nie ma tutaj zbyt dużo roboty, więcej zapewne dzieje się wewnątrz tych klas, ale przecież po to one są żeby się tym z grubsza nie przejmować. Kolejny kod przedstawia sposób tworzenia zapytań za pomocą wspomnianej biblioteki org.json:

1
2
3
4
5
6
7
8
9
10
11
12
import org.json.*;	//JSONArray, JSONException, JSONObject
 
/*
...
*/
 
JSONObject root = new JSONObject()
    .put(“sesid”, sesid)
    .put(“action”, action)
    .put(“data”, data);			 // data może być liczbą, stringiem lub obiektem JSONObject
 
string query = “json=+ root.toString();

Ostatecznie obiekt query zostanie przekazany jako zapytanie do wcześniej wspomnianego obiektu klasy BufferedWriter, dzięki któremu poleci do serwera. Odbieranie odpowiedzi jest równie proste:

1
2
3
4
5
6
7
8
9
10
11
string answer;
 
/* Odbieranie odpowiedzi
...
*/
 
JSONObject object = new JSONObject(answer);
int status = object.getInt(“status”);
string text = object.getString(“some_text”);
JSONObject node = object.getJSONObject(“some_struct”);
JSONArray array = object.getJSONArray(“some_array”);

I generalnie tak to wygląda, nie trzeba nic samemu parsować, ponieważ wszystko zapewnia kilka gotowych już klas – największa zaleta obiektowych języków programowania.